Installing Windows Server 2019
A short tutorial on how to set up Windows Server 2019, in a Virtual Machine
What is this post about?
During this post we are going to explore and learn how to install Windows Server 2019, in a VirtualMachine to use it for other pourproses. To have a bit of context of this OS, Windows Server is the branch of the main OS of Windows centered to be hosted in servers as his name indicates, in the market it is show that everyone tend to choose to use Linux Server distros than Windows Server, but still some companys choose it because his compatibility with empresarial apps that are still unable or will be unable to run on Linux. As this, it is normally use Windows Server 2019, sometimes because the system wasn’t updated for long other because how much information and experience exist in this OS than other newer versions. Now that we have a bit of context we can start
Step to follow
Installing a Virtualitation System for OS
The first thing we have to do is install a Virtualitation System for OS (Or commonly know as a Virtual Machine), for this in this tutorial we are going to use VirtualBox from Oracle, to install you can click on this.
It is recommended to install also the VirtualBox Extension Pack, this will add functionalities if you are interested in learnig more about it click on this
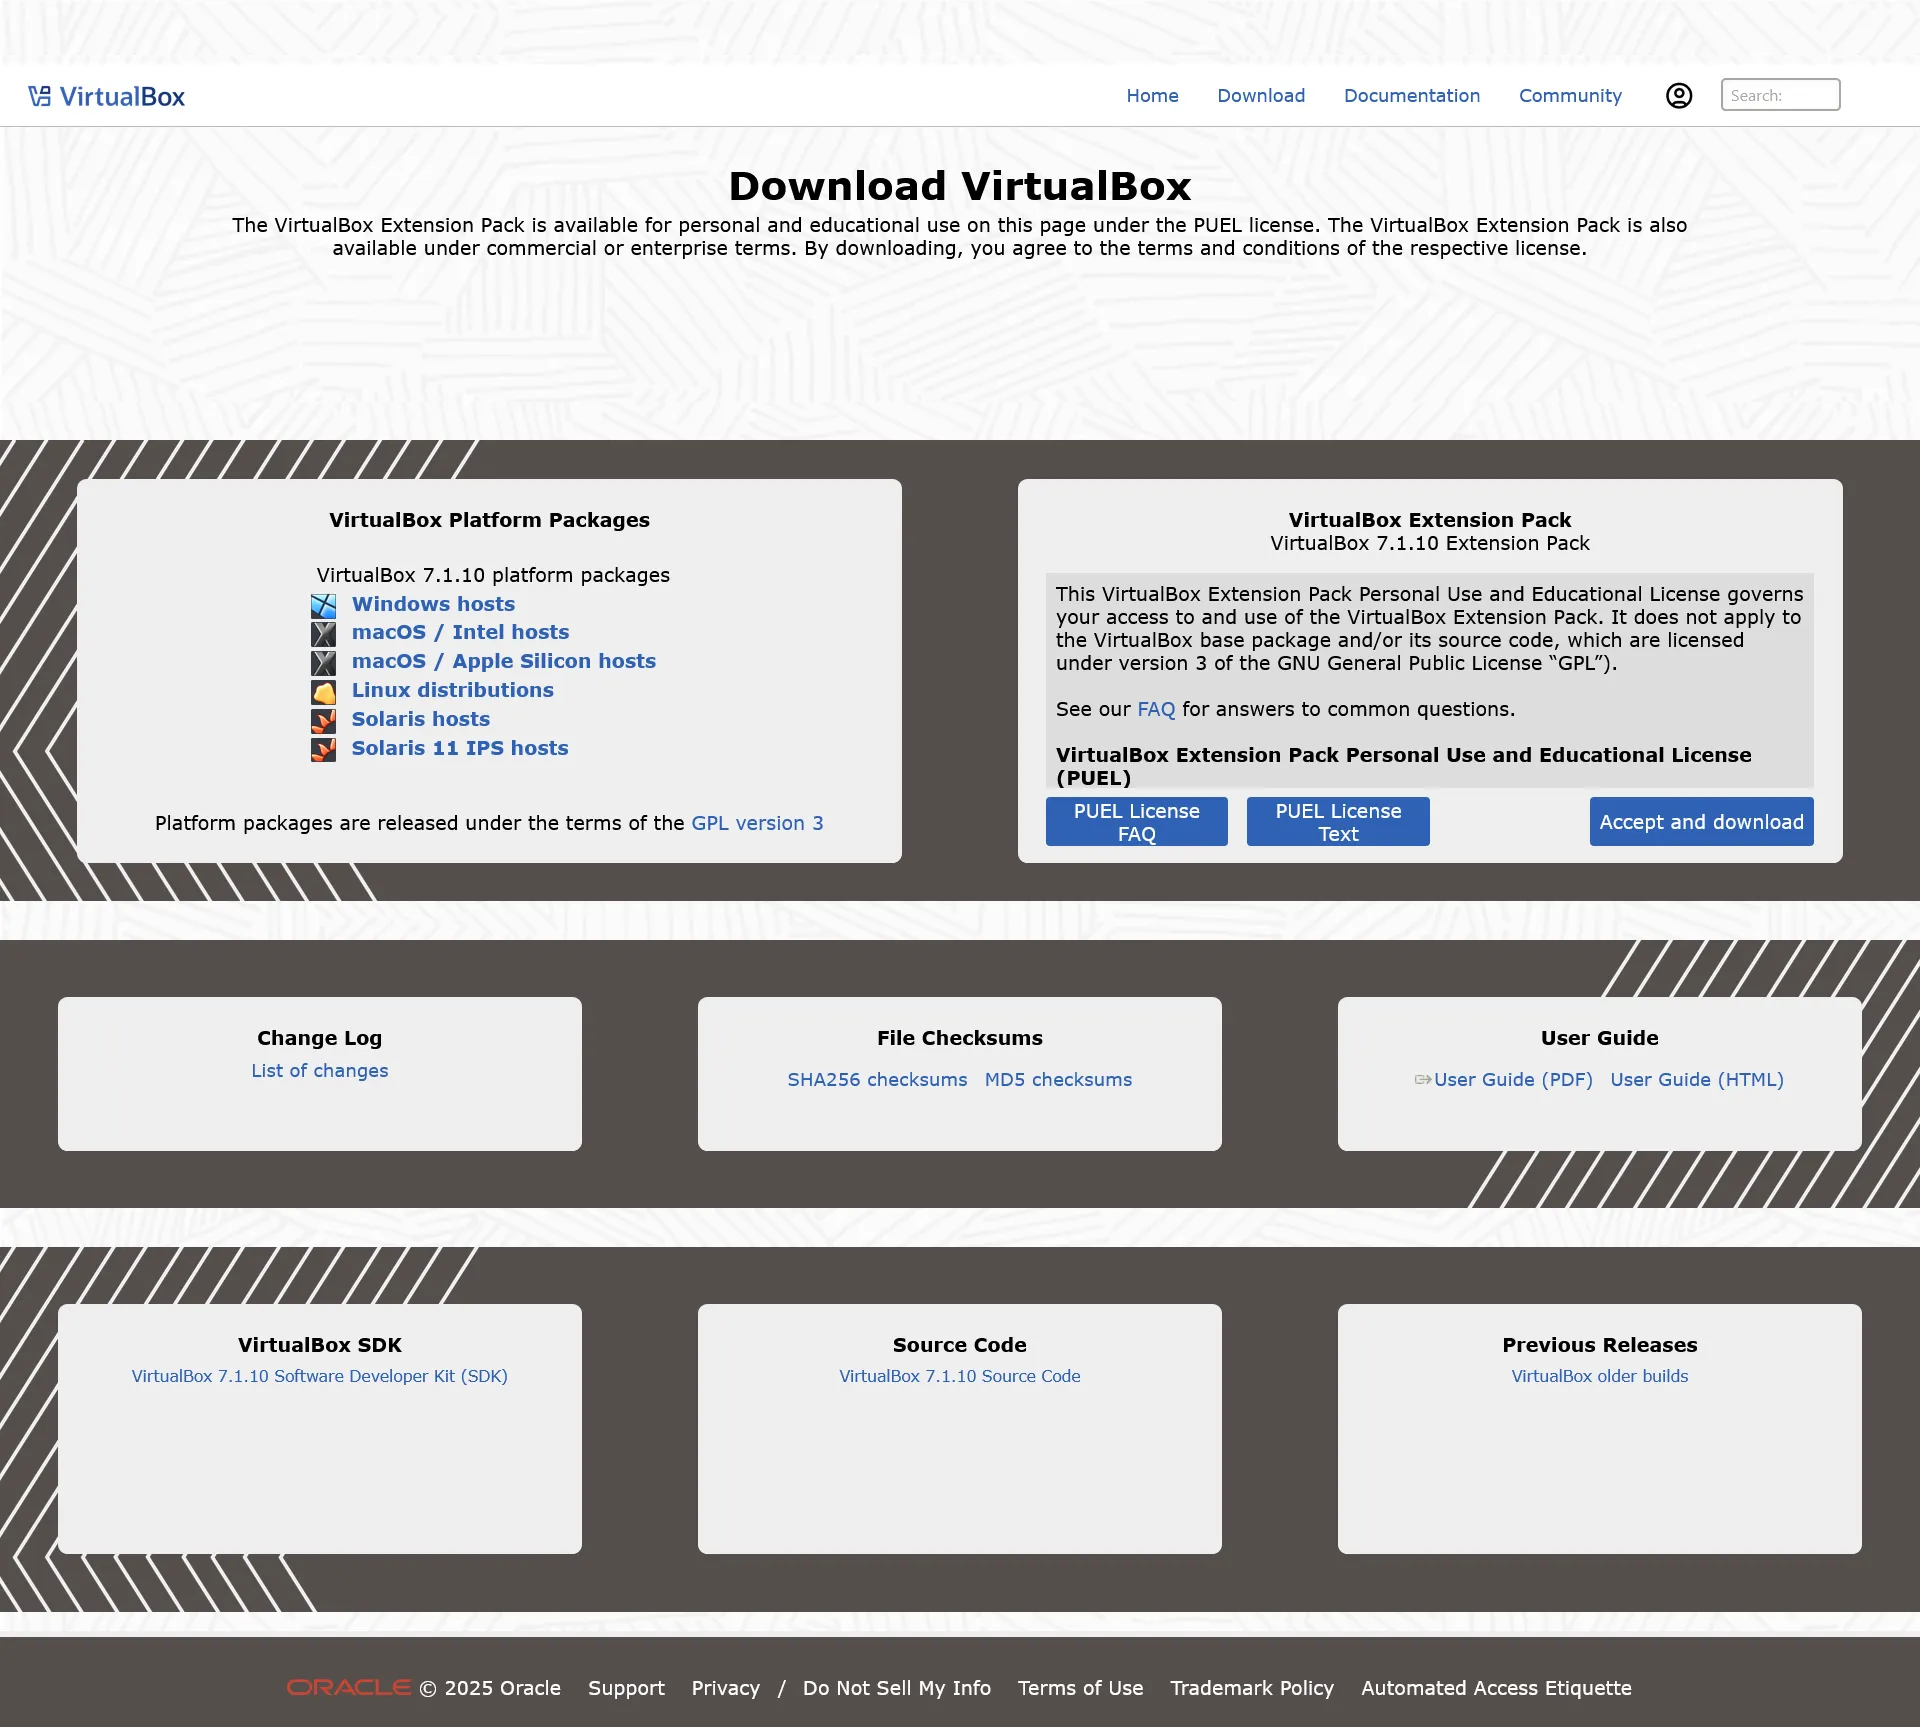 VirtualBox Main Download Page
Obtaining Windows Server 2019 ISO
The next thing we have to do is install the Windows Server 2019 ISO, for this we have to go to this website, and select the language and version we want
Please remember that what you are downloading is the Windows Server 2019 ISO Trial version, this version will erase all the files after around 120 days, so if you’re using to really deploy a system please obtain a Licence or don’t save importants file in this system
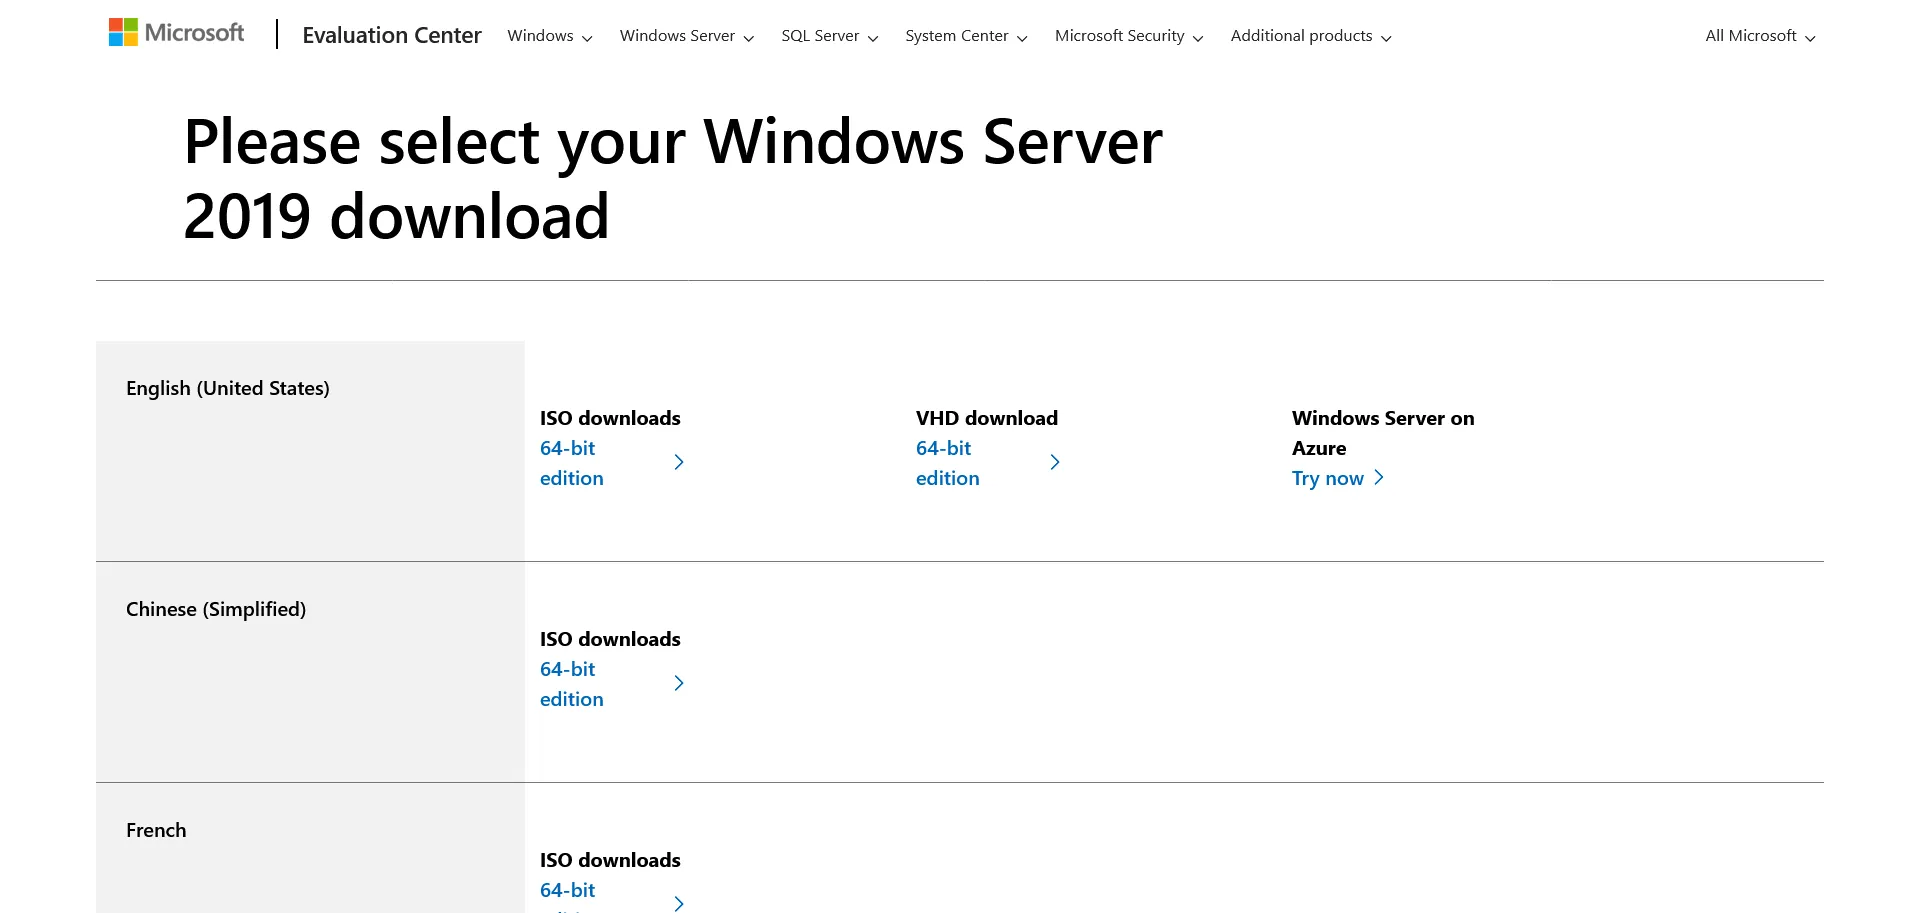 Windows Server Main Download Page
Configuring VirtualBox
Information of the ISO
Now that we have installed VirtualBox and the ISO of Windows Server 2019, we are going to press the button that says: “New”, and it will open a new page where it will ask us for a name, where he wanted to save the virtual machine, and to select the OS were emulating. We don’t have to write all of that with selecting the image ISo will answer all the question of it.
If we aren’t doing any test with the windows ADK or if we don’t want to do an unattended instalattion, we can disable the checkmark all down.
A Windows Unattended Installation, is when you use the Windows ADK to develop an installation with premade configurations, is worth it to do when you’re doing installations in multiples devices
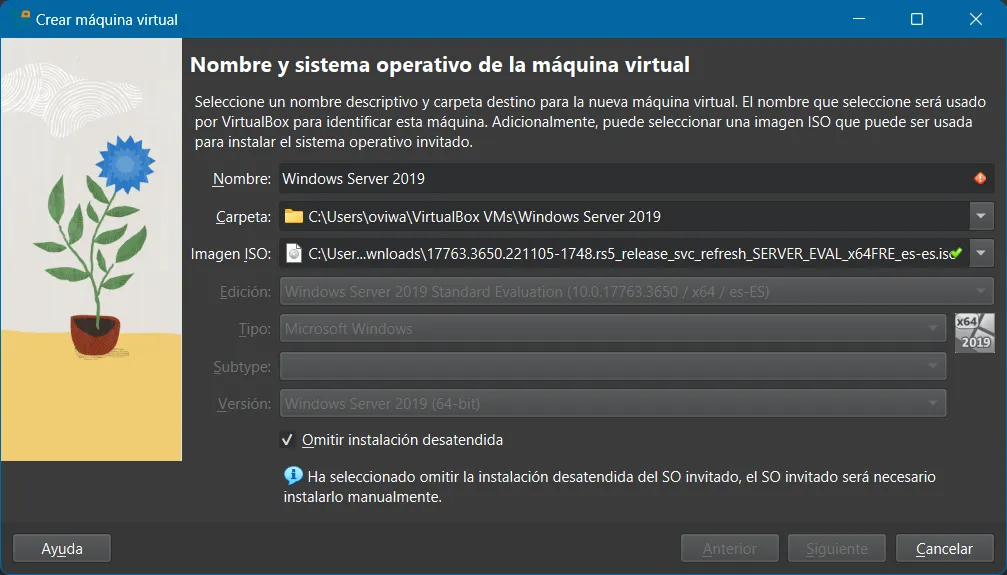 Virtualbox Main Configuration Page
Hardware Configuration
Next we have to give it the memory and processors we want the machine to use. It worth to remember that this would depend in what system do you have so test it out. The miniums specs for Windows Server 2019 are:
- 2GB for Server Experience / 4GB for Server with GUI Experience (We learn more in the upcoming section)
- Cores depend on the app running but for the OS only 2 cores could do it, recommended at least 4
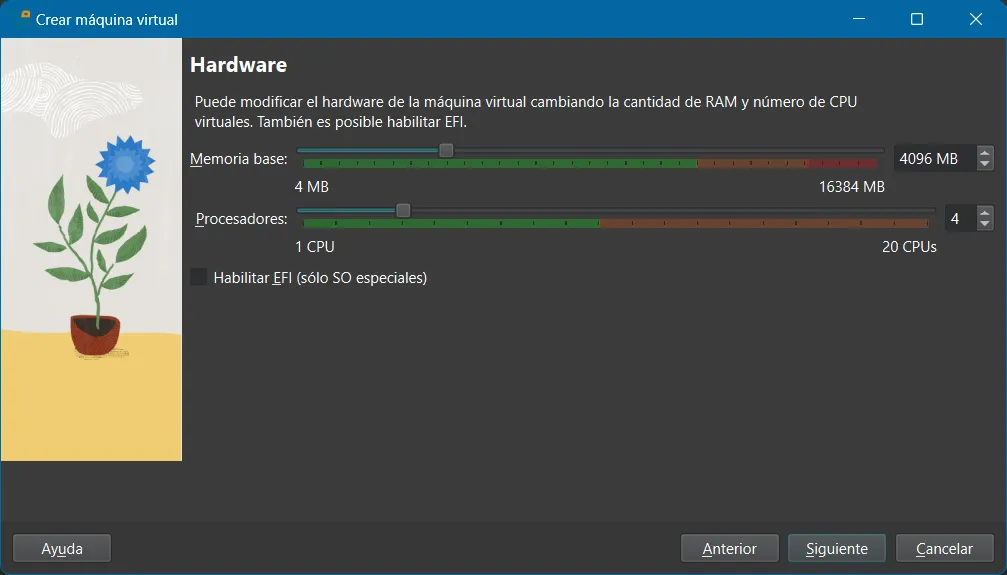 Virtualbox Hardware Page
Virtual Disk Configuration
Next we are going to give some space to the virtual machine. It happens the same that with the hardware section depends on what device you have, but the minimums are:
- 32GB of free space
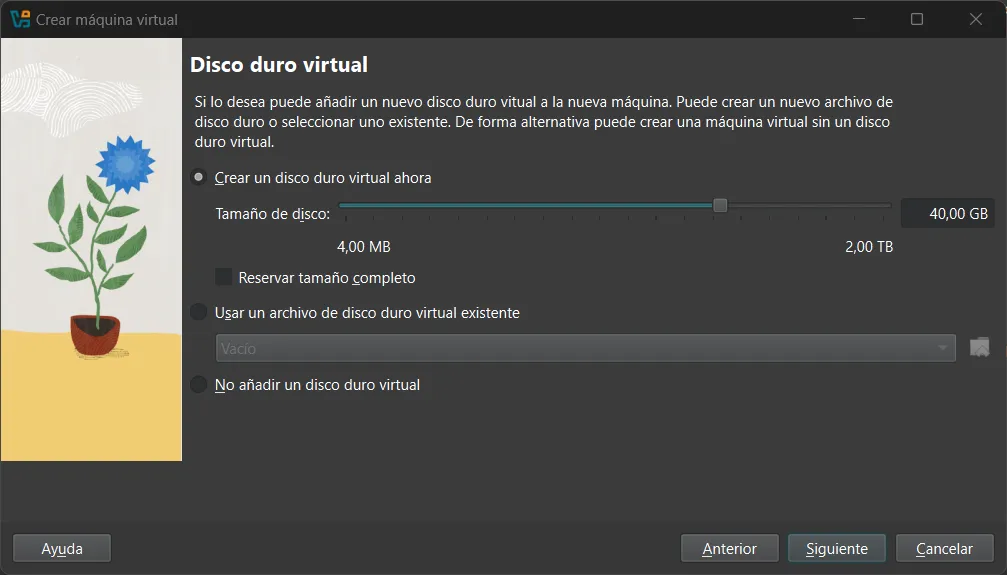 Virtualbox Virtual Disk Page
Configuring the OS
If everything has been done correctly you will reach to this window, here you will select the language, the timezone and the keyboard config.
If you download it from the link I gave there isn’t going to be any more options because that ISOs, only have 1 language
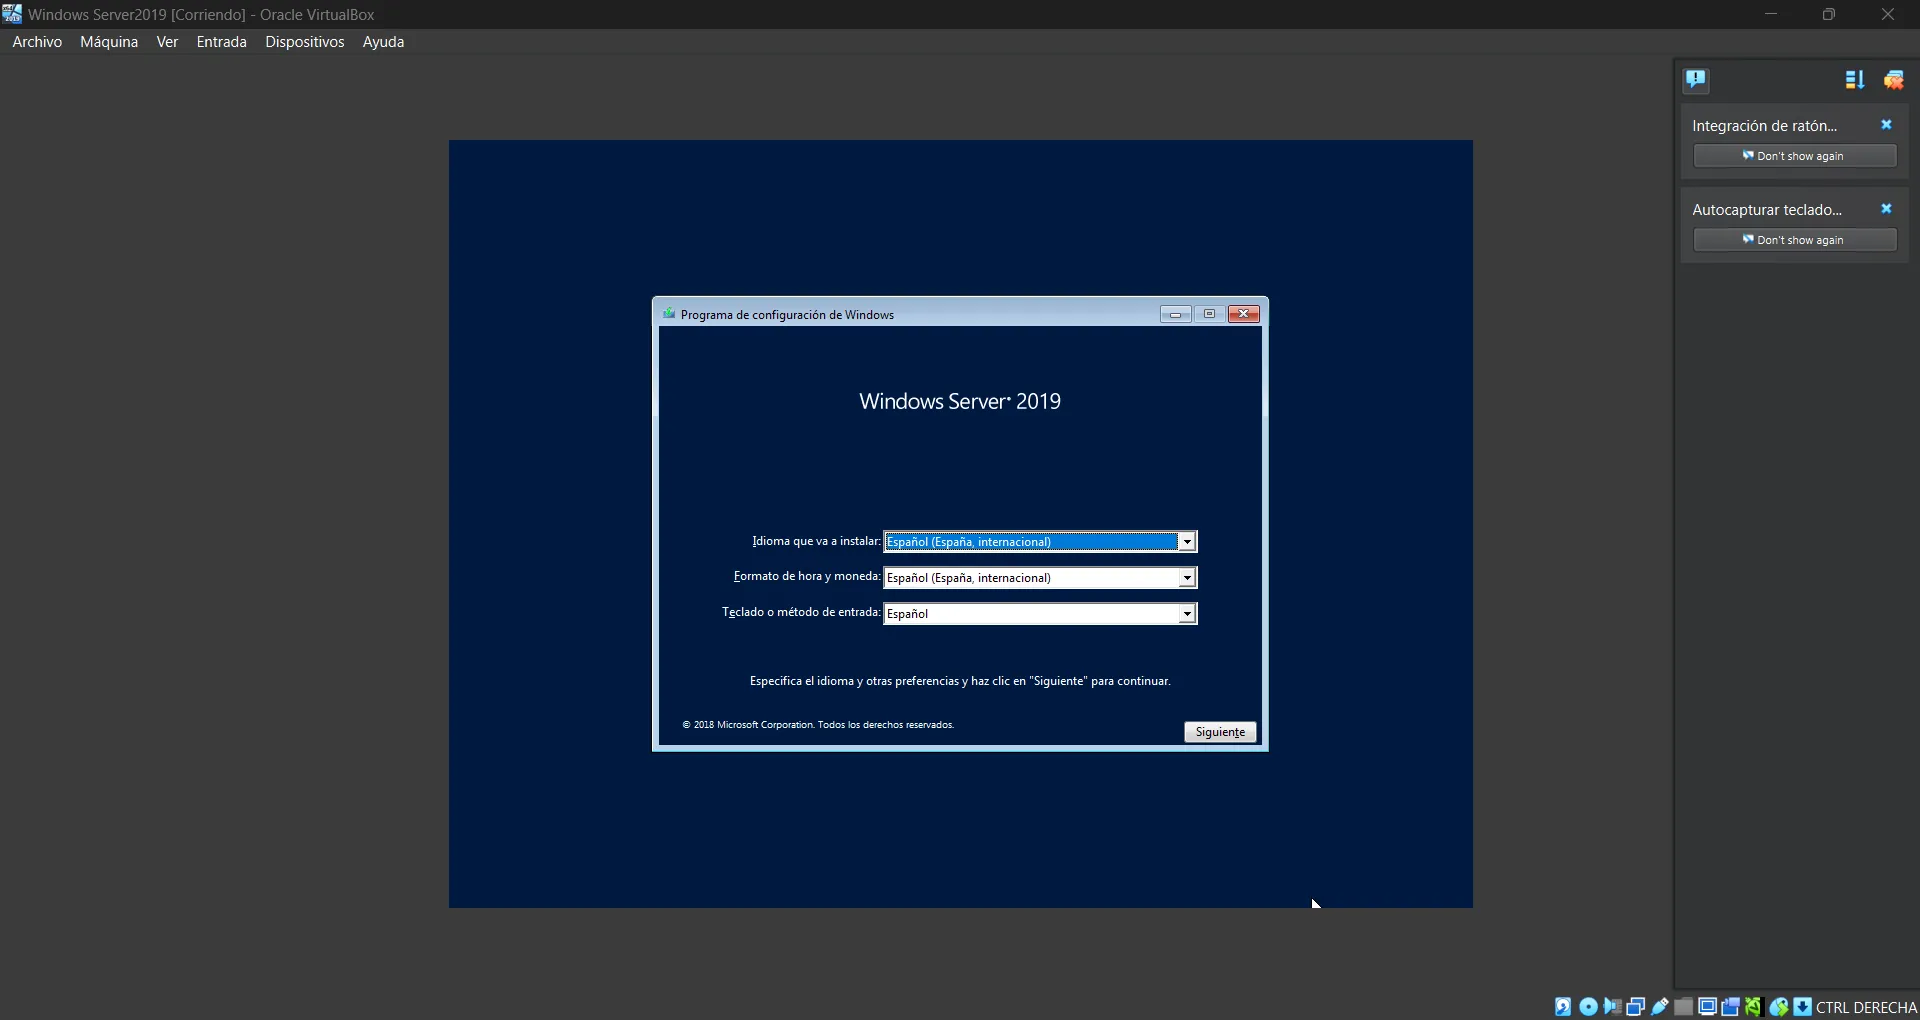 Windows Server Installation Startup Page
The next option will be:
- Windows Server 2019 Standard Edition (With/Without GUI)
- Windows Server 2019 Datacenter Edition (With/Without GUI)
If you want to know what version you should use use this guide from microsoft to check what it have both of them.
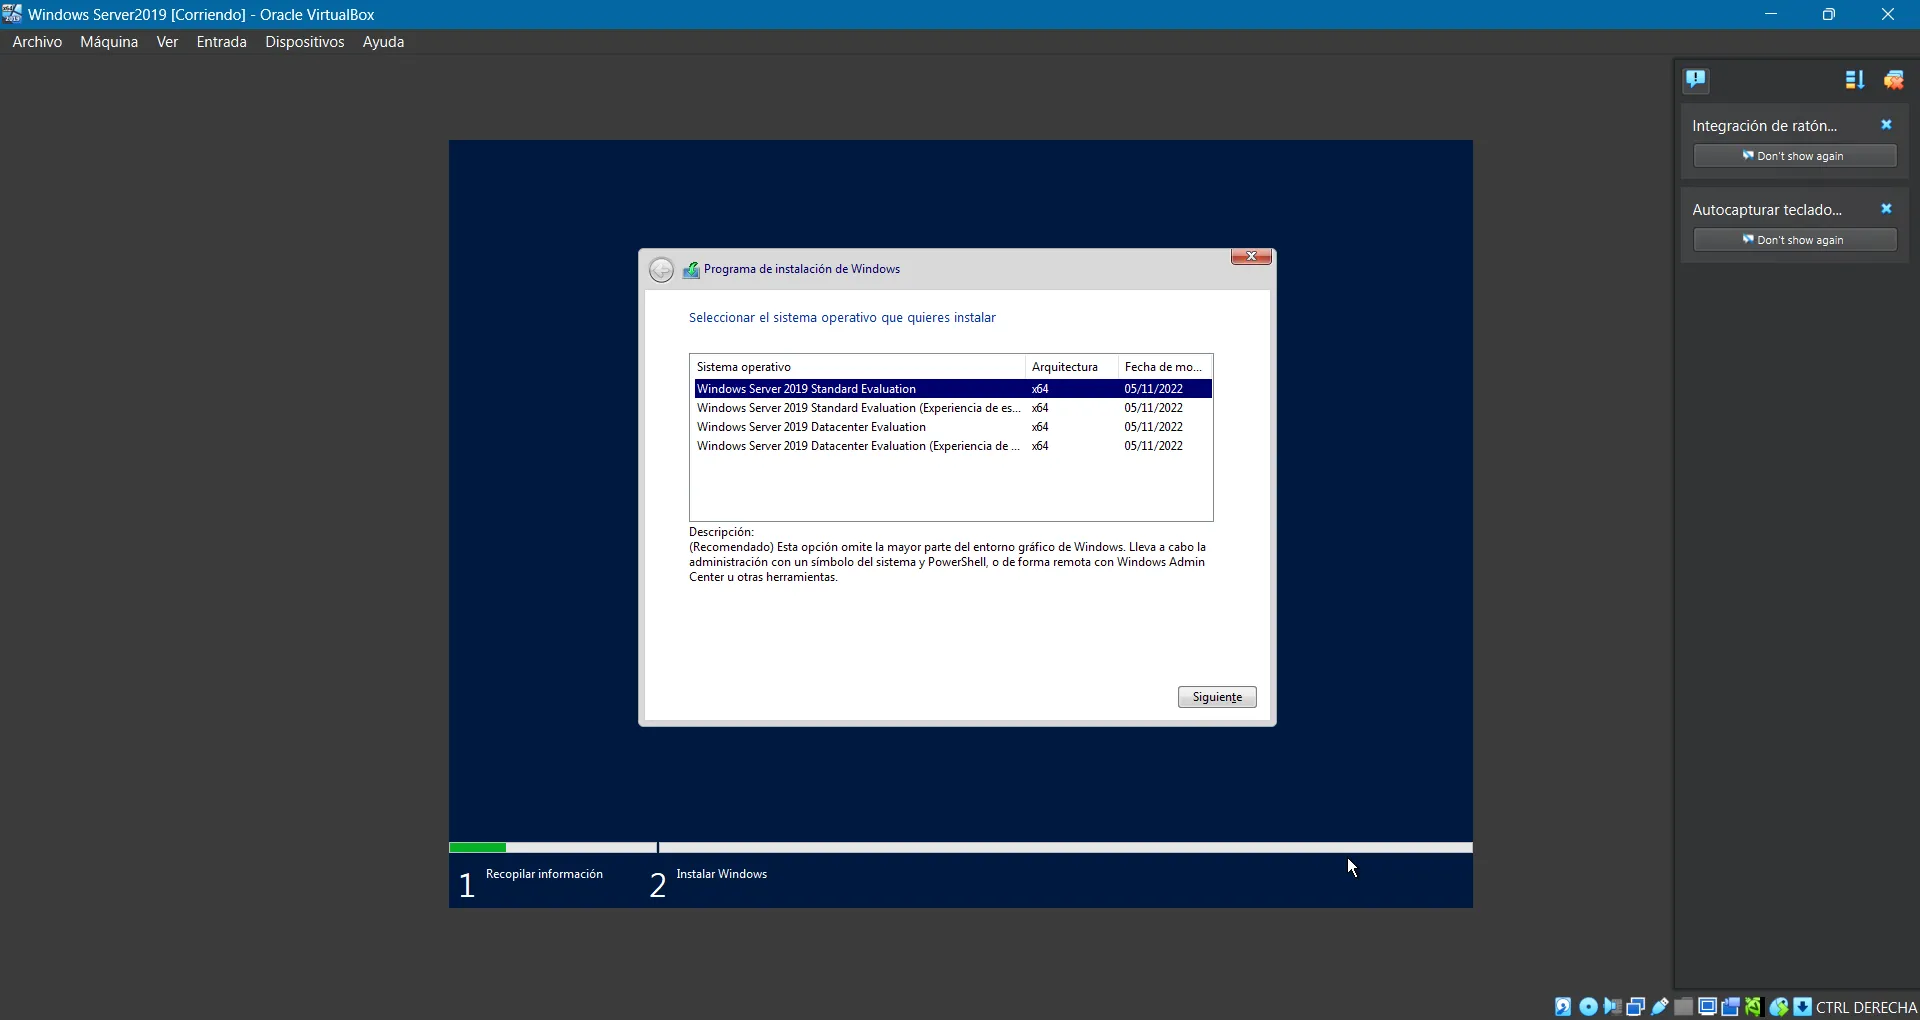 Windows Server 2019 Edition Selection Page
The last thing we have to do is to change the password the system has by default
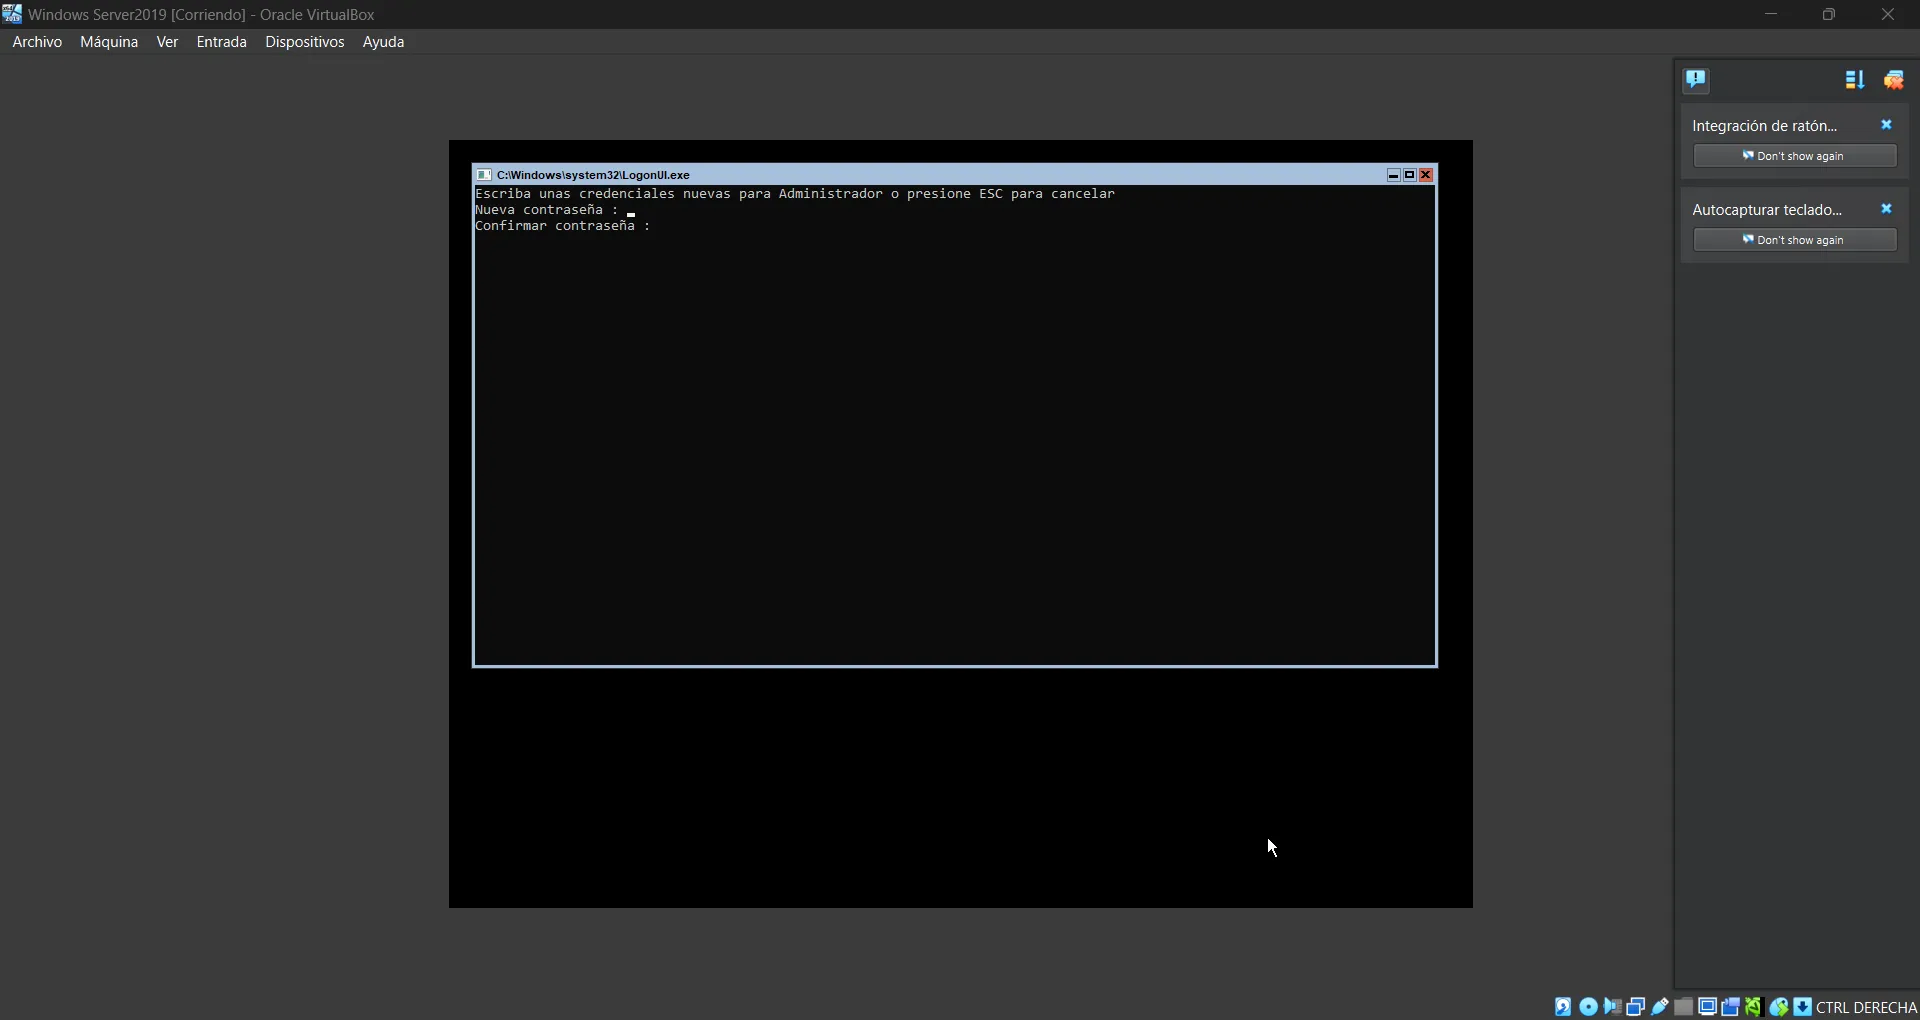 Windows Server 2019 Password Change
Ending
With that we have sucessfully installed Windows Server 2019 in a virtual machine, coming soon I will do more tutorials centrered in this topics